
Lately I’ve been feeling so inspired by woven photo collages and thought I’d put together a few quick ones in PhotoShop. Digital collages may not look as tactile and impressive as printed ones, but it’s much faster, less expensive since you don’t have to shoulder printing costs, and also cleaner. No mess. The other advantage of collaging with PhotoShop is you can easily move your photo around behind the mask to find juuuuust the right position for it. Cut and woven printed photos take some time and are so final.


When I was younger, I used to loooooove cutting up photographs and collaging them together. A budding photographer and soon-to-be art major, I was already interested in paper manipulations. Developing a good photograph is cool, but there is so much more that you can do with a photo once it’s printed.

As much fun as cutting up photographs and weaving them together is, it’s super time consuming. So, here we go with the digital version.
How to Make a Circle Photo Collage in PhotoShop
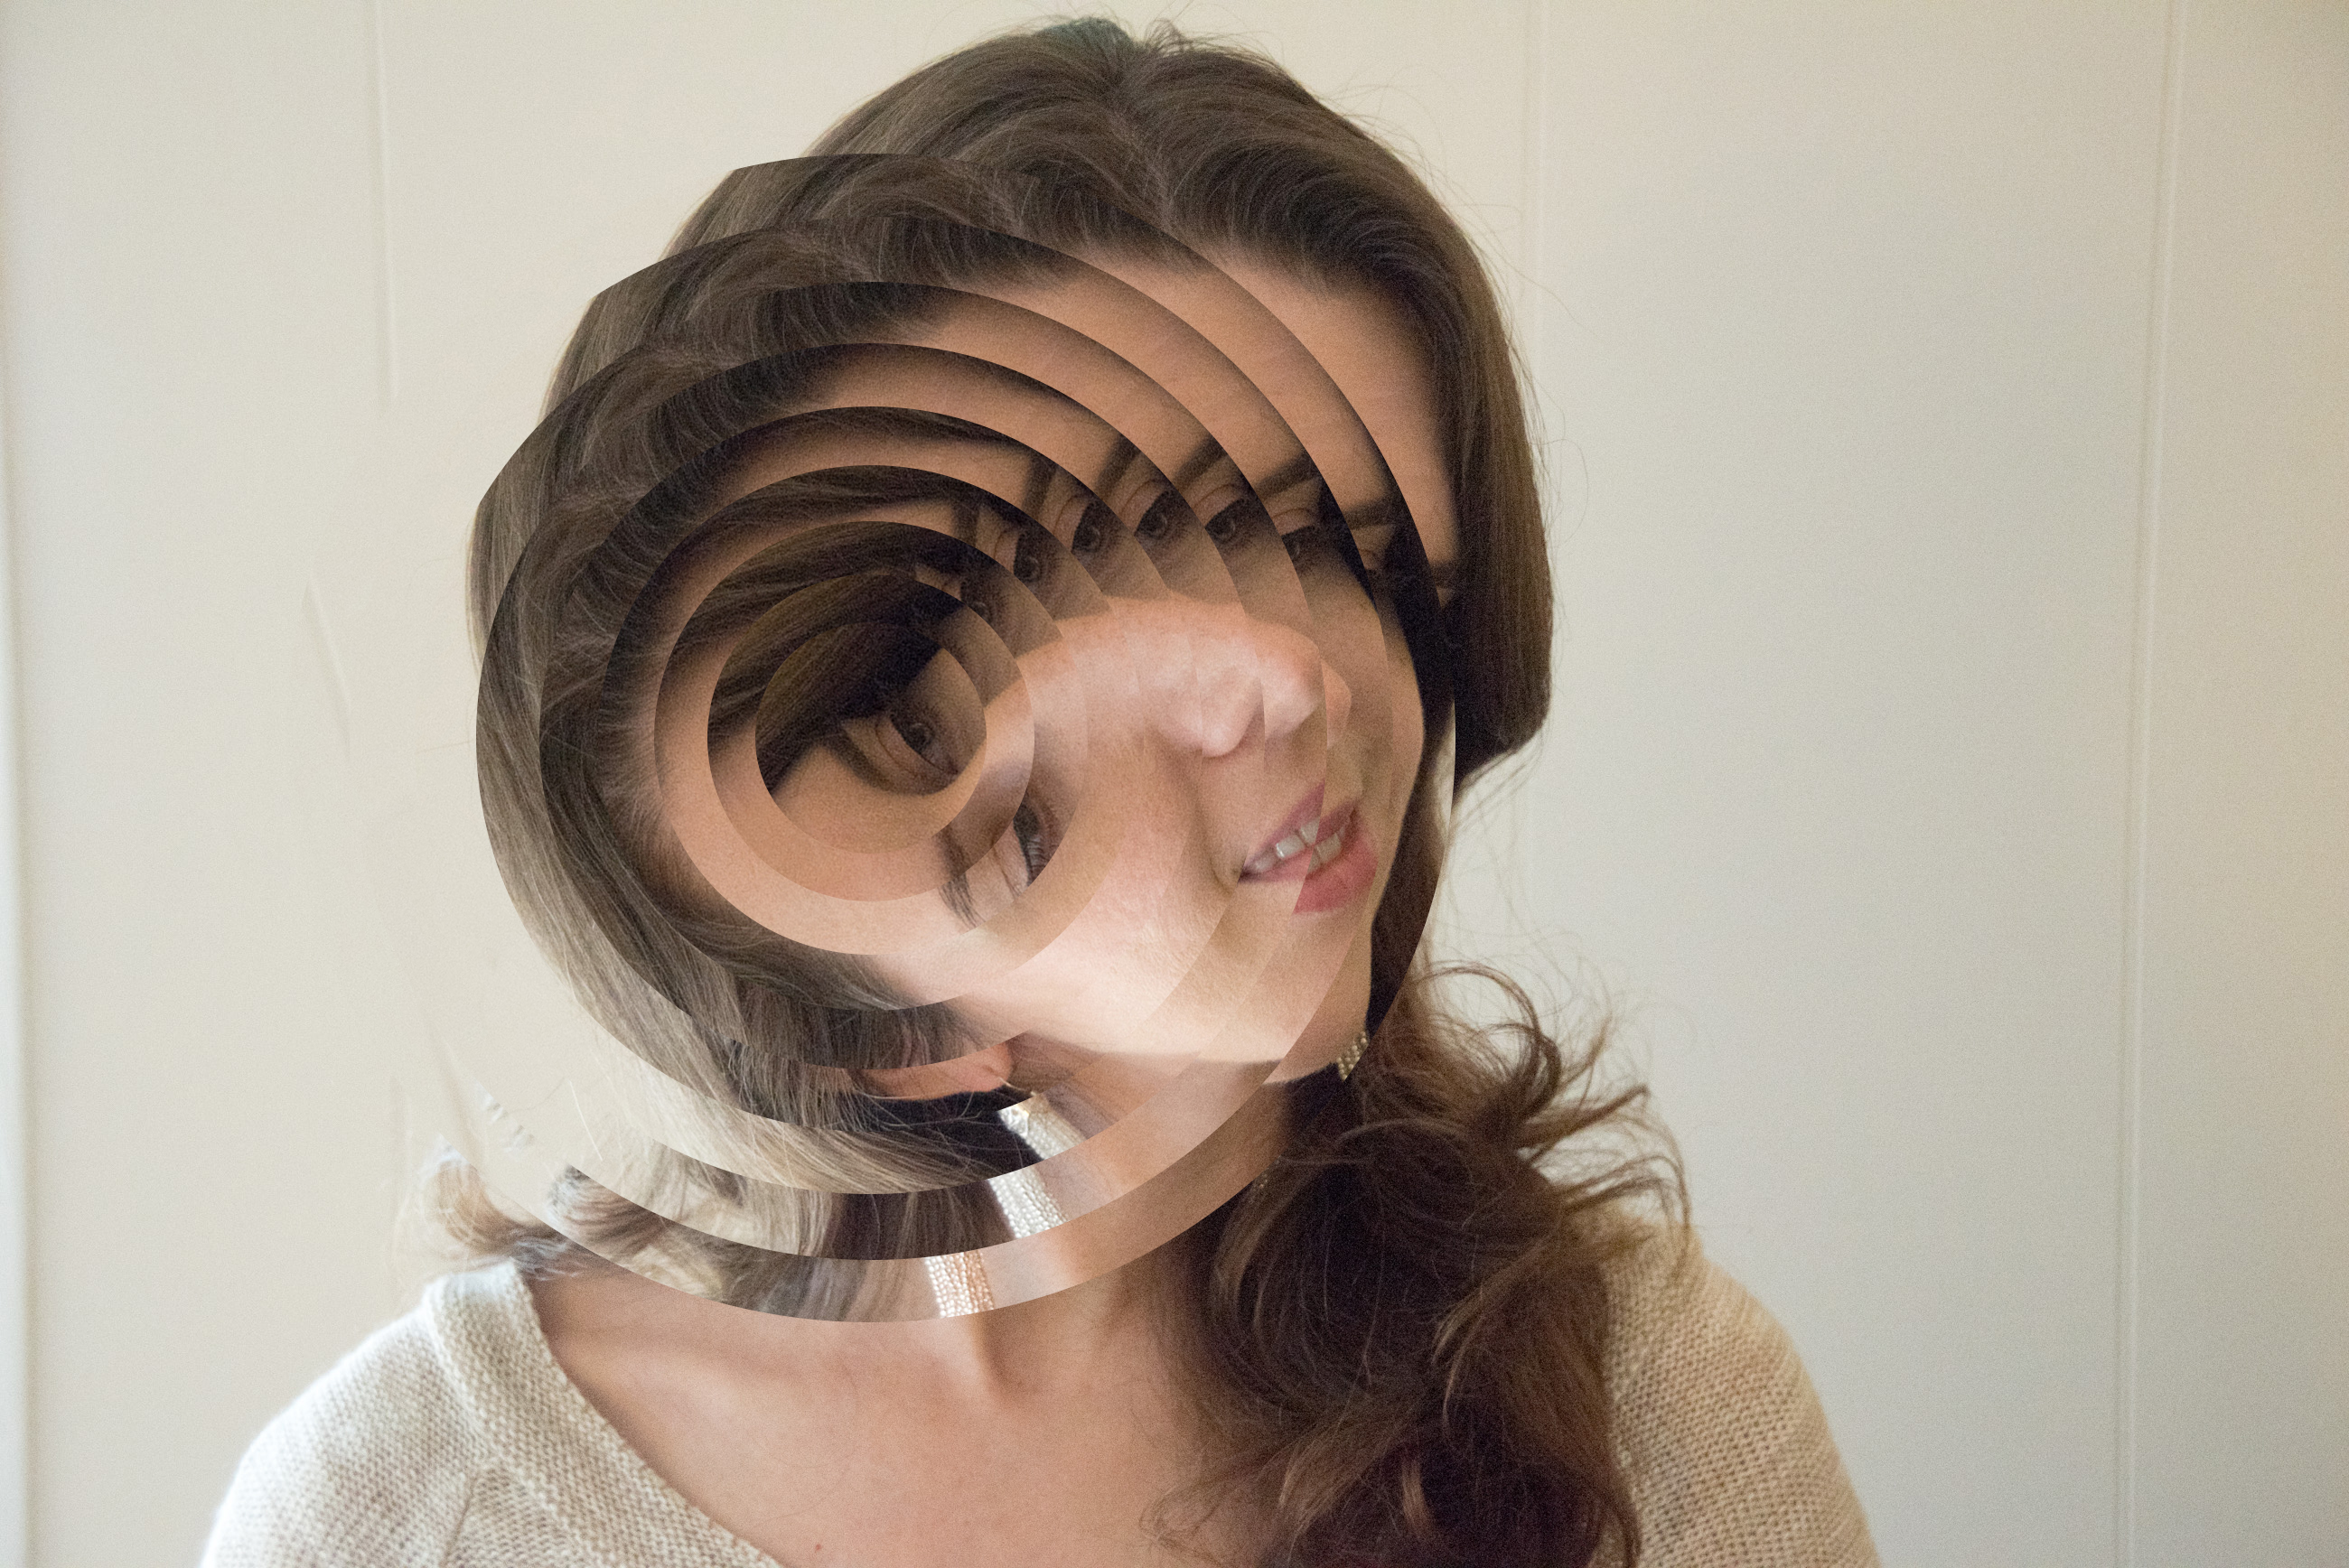
The first digital collage uses a single photo and layer masks. First, open a portrait in PhotoShop. Click on the shape tool, and select the solid circle with no border. Draw a circle over the face. Drag the circle in the Layers panel to the Copy Layer button. Hold down Shift + Option, and resize this circle to be slightly smaller than the other one. Repeat these steps until you have a very smallish circle in the middle.
Click the Background layer in the Layers panel, and drag it to the Copy Layer button. This copies the portrait. Move this layer copy above the largest circle. Right click on it, and select “Create Clipping Mask”. Press Control T, hold down Shift and rotate this portrait layer 15 degrees to either side. Repeat these steps until all of the circles have a clipping mask with a photo in it.
Now for the “yay technology” part. Hold down option and select all of the circle layers – just the circles, not the clipping masks. Click the artboard and drag your mouse to move the layers around until you find the best composition. This looks so cool! It would make a cool movie or movie effect.
How to Make a Woven Photo Collage in PhotoShop
First, open the base photo. We are going to draw a grid with guides. Make sure your window has rulers and guides turned on. Click the ruler, and pull your mouse to the photo to create a guide. Position the guide where you want it. Repeat, drawing all of the horizontal and vertical guides across your photo. This will vary depending on the size of your photo. My guides were a quarter of an inch wide on the outer sides of the photo, and half an inch wide near the center. Do whatever pattern you think looks cool.
Next, we’re going to make a black checkerboard layer over the guides. Grab the square shape tool and set the fill color to black. Draw a little black square in one of your guide spaces. Copy this layer, and drag it two spaces over. Select both the squares you just made, and copy these layers. Arrange these squares down and to the right one space. You should have a little checkerboard. Toggle off the guides and make sure the corners all match up. Toggle the guides back on. Continue to copy all square layers and position them in place until you fill the whole photo with a checkerboard pattern.
After that, select all of the black squares. Right click and select merge all layers. You should have two layers now – the original photo and a black checkerboard.
To finish the collage, we will make a clipping mask with another photo over the checkerboard. Drag a second photo to the artboard. It should show up as a new layer. Right click the photo and select create clipping mask. This should replace the black checkerboard with a photo checkerboard. Move the two photos around as needed to find the best composition.
There are so many more cool things you can do to your digital woven photo collage. The possibilities are endless! If you want to, you can also create a blur effect on the outer layers of his portrait. One advantage of this is that it makes the photos more ghostly, and less macabre-confrontational than they can look if they are super sharp. The softness of a well-placed blur can bring out a sense of movement, the illusion of memory, and sense of a soul. To add a blur effect to yours, bring in a little Gaussian blur layer. You can do this after you collage the photos together or before.
Don’t feel like making a collage yourself? Looking for someone with more expertise? Try commissioning a real collage from an artist, like Jean Faucheur. I love his curious collages! I don’t know him at all personally, but if you reach out he may make a custom art piece for you. Physically woven photos are certainly more interesting than digitally ones. Try it!